Next-Level Virtualization: Windows 11 ARM64 Meets Apple Silicon
Merging Worlds: How VMware Fusion Brings Windows 11 to Apple's Cutting-Edge Silicon
In this article, I'm excited to share the process I used to set up a VMware Fusion VM running Windows 11 ARM64.
Let's dive in:
Step 1: Grab a copy of VMware Fusion v13.5x+ suitable for your needs at VMware's official site. Fusion_Buy_Dual (vmware.com)
Step 2: Download the latest Windows 11 ARM64 evaluation version from the Windows Insider Preview ARM64 page on Microsoft's website. Download Windows Insider Preview ARM64 (microsoft.com) This file is a Hyper-V ready virtual disk, but we need it in VMDK format. I'll show you how to convert it using QEMU - it's straightforward and free.
Step 3: If you haven't already, install Homebrew on your Mac. It's a package manager akin to apt on Debian or yum on Suse. To install, execute:
/bin/bash -c "$(curl -fsSL https://raw.githubusercontent.com/Homebrew/install/HEAD/install.sh)"
Post-installation, you'll need to run an additional command to add Homebrew commands to your path.
Step 4: Install qemu using Homebrew:
brew install qemu
If you're not keen on installing extra software, feel free to perform the next steps on a Linux machine. Personally, I transferred the VHDX file to an Ubuntu machine and converted it there.
Step 5: Convert the VHDX to a VMDK file using the following steps in Terminal:
cd ~/Downloads
qemu-img convert -f vhdx -O vmdk <YourVHDXFileName>.VHDX <YourNewVMDKFileName>.vmdk
This conversion might take a while, so grab a coffee and be patient.
Step 6: Once converted, move the VMDK file to your preferred location for VMware virtual machines.
Step 7: Fire up VMware Fusion and set up a new VM:

Choose “Create a custom virtual machine”.
Select the “Windows 11 64-bit Arm” OS.
Enable “UEFI” and “UEFI Secure Boot”.
Set a password for the virtual TPM (Tip: Let it auto-generate and save to your Mac's keychain for convenience).
Opt for “Use an existing virtual disk”, then select your newly-created VMDK file.
You might notice the VM boots directly to UEFI without internet access. This hiccup occurs because the default network driver isn't optimal and the image doesn't contain the necessary VMware drivers.
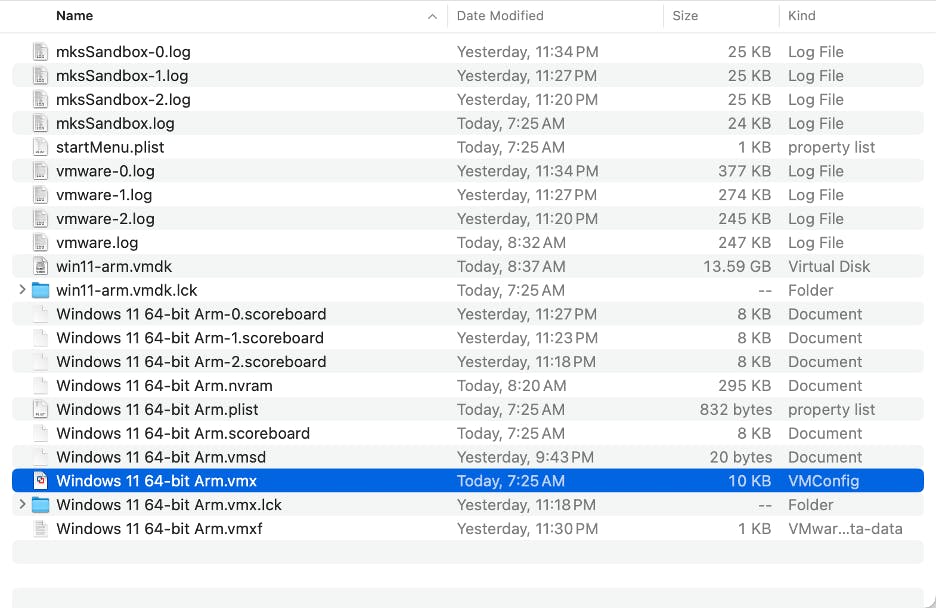
Step 8: If your VM is running, shut it down. Then, in Finder, head to your Virtual Machines folder, right-click the .vmbundle file, and select “Show Package Contents”.

Find the .vmx file, right-click, and open with TextEdit. Near the document's end, locate the line:
Ethernet<#>.virtualDev = "vmnet2"
Change vmnet2 to vmxnet3. The <#> corresponds to the network adapter number in your VM.
Step 9: Boot up the VM and enter Audit mode during the Out of Box Experience (OOBE) by pressing SHIFT + CONTROL + F3.
Once logged in as an administrator, install VMware Tools from the VM menu.
Step 10: After VMware Tools installation and a reboot, ensure internet access is working. In the System Preparation Tool 3.14, opt for “Enter System Out-of-Box Experience (OOBE)” and select “Generalize”. Choose Reboot and click “OK”.
The system will prep itself with the new drivers, and you're good to go! Feel free to clone the .vmdk for future use. I store mine externally for quick VM setups.

